
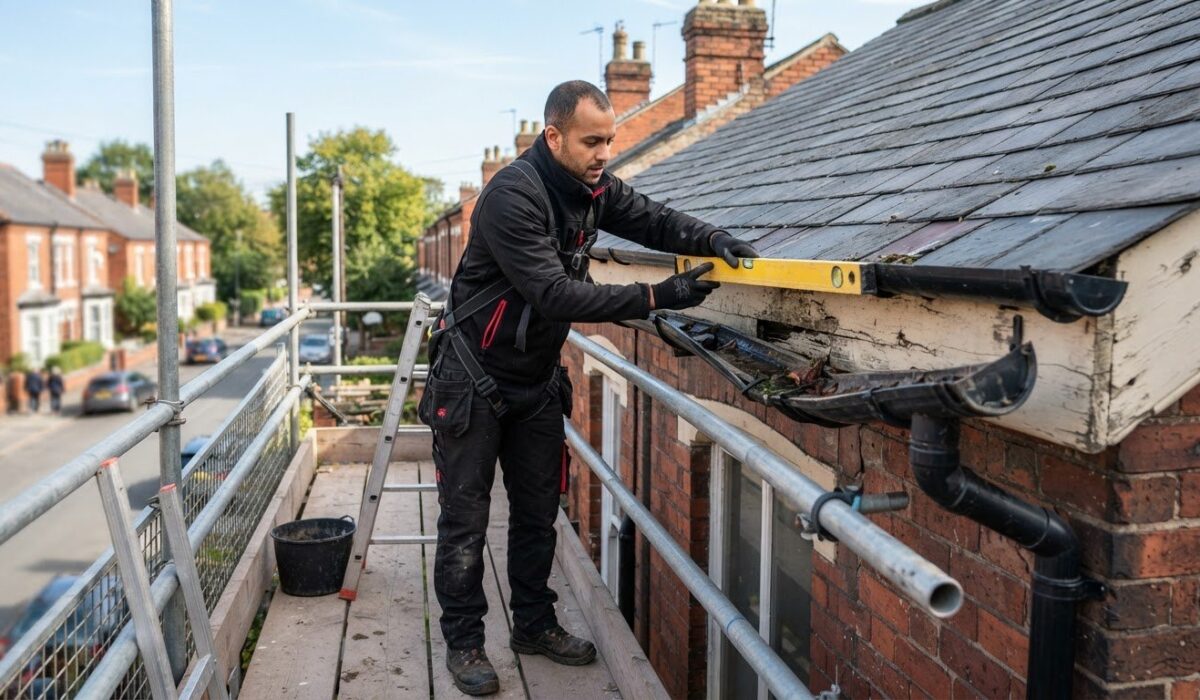
Replacement isn’t always the answer. How we fix sagging gutters depends on whether the gutter channel and fascia are still sound. If they are, clear debris and blockages, restore a consistent fall towards the downpipe, and secure or replace failed brackets. Gutters should slope at 1:350. If the fascia is weak, the gutter is cracked or permanently distorted, or it keeps sagging, replacement may be the more reliable choice.
A sagging gutter can leave water pooling or spilling against a property, so identify the cause before choosing a repair. This guide explains how to inspect the gutter, check the outlet and downpipe, spot problems with brackets and fascia, and decide whether a repair is practical. It also covers when a wood sliver and epoxy may support a loose gutter spike, and when working at height calls for professional help. Use these steps to assess a Nottingham home or commercial property and identify what needs attention before the next downpour.
Key Takeaways
- Check the gutter channel, brackets and fascia before deciding whether a repair can hold or replacement is needed.
- Clear debris and check the outlet and downpipe before judging the gutter’s alignment or resetting its fall.
- Use suitable, secure fixings and add support where needed; a wood sliver with epoxy can help support a loose gutter spike.
- Look for warning signs such as repeated sagging, cracks, leaking joints or soft fascia timber when weighing repair against replacement.
- Keep ladder safety in mind: according to UK Government, a ladder used to access another level should be tied and extend at least 1 m above the landing point.
Can Sagging Gutters Be Repaired Without Replacement?
Yes, if the gutter channel is intact and the fascia board is sound. We can assess the gutter, reposition its brackets and check drainage to determine whether a repair is suitable.
- Check the full gutter run first. Clear leaves and silt, then inspect the outlet and downpipe before judging the alignment. Look for cracks, leaks, permanent bends and soft timber around the fascia board. A sound channel with a few loose brackets may be repairable. Repeated sagging, several leaking joints or a weak fascia may mean replacement is more suitable than another bracket repair.
-
Reposition Brackets While Maintaining Pitch
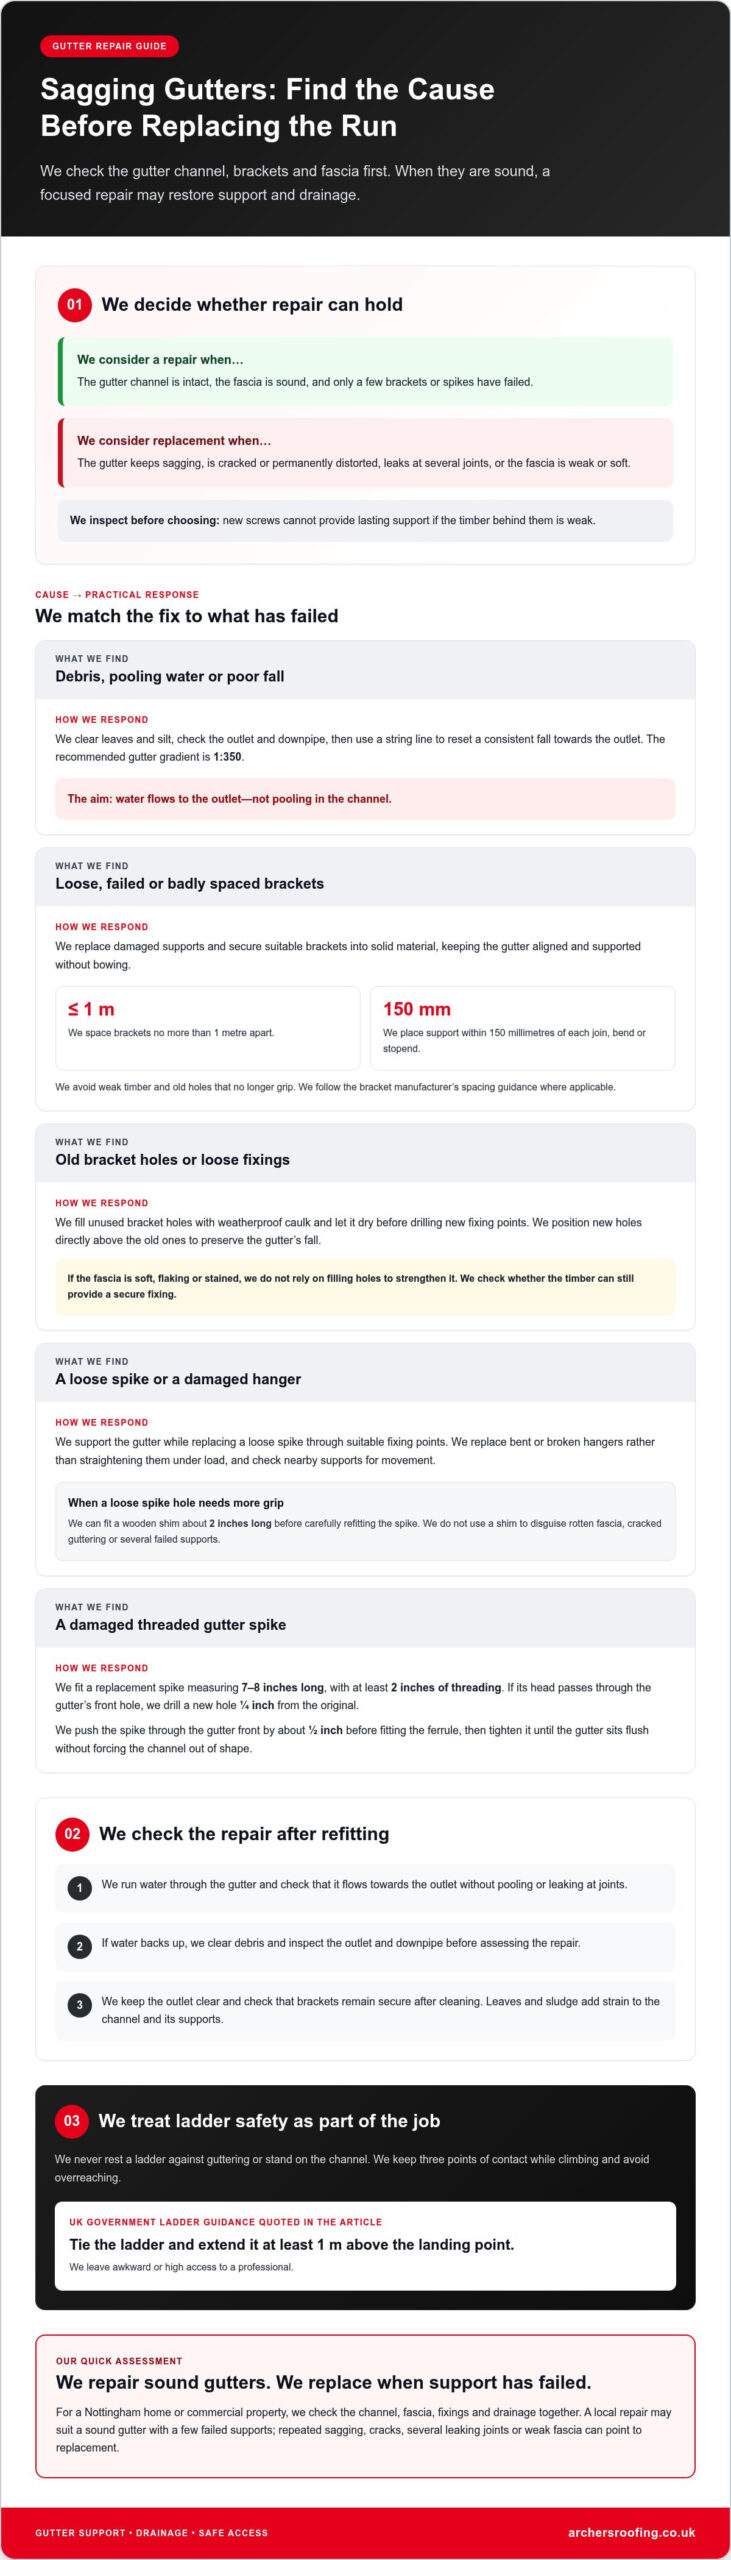
We set a string line along the gutter towards the downpipe to check for a consistent fall. The recommended gradient is 1:350. We position support brackets no more than 1 metre apart, and within 150 millimetres of each join, bend or stopend. We keep the channel from bowing or holding pooled water. Brackets need secure fixings into solid material, not weak timber or old holes that no longer grip.
-
Fill Old Bracket Screw Holes
Before drilling new fixing points, fill unused bracket holes with weatherproof caulk. Let it dry to seal the old opening before making another. Position new bracket holes directly above the old ones to preserve the gutter’s fall. If the fascia is soft, flaking or stained, filling holes will not strengthen the timber or create a secure fixing.
-
Reattach Gutters with Brackets
Choose brackets designed for the gutter profile, then secure them with exterior-grade screws into solid timber or their intended fixing points. Follow the bracket manufacturer’s spacing guidance and preserve the fall towards the outlet. Plastic brackets can become brittle, while metal fixings may corrode or loosen. Replace damaged supports rather than relying on a screw that no longer holds firmly.
- For plastic gutters, we replace brittle brackets and secure the channel without forcing it out of shape. For metal gutters, we inspect fixings for corrosion and replace damaged supports. The practical UK guidance here is to maintain secure fixings and a consistent fall; it doesn’t set out a separate building-regulation approval process for gutter repairs.
- Gather a ladder, ladder stand-off, string line, drill, screwdriver, suitable brackets, exterior-grade screws and weatherproof caulk. After refixing, run water through the gutter to check for pooling or leaking joints. To reduce repeat sagging, keep the outlet clear and check that brackets remain secure after cleaning. Avoid loading leaves and sludge into the channel.
- We treat ladder work carefully because it risks falls, unstable footing and overreaching. We never rest a ladder against guttering or stand on the channel. We maintain three points of contact while climbing. According to UK Government, ladders used to access another level should be tied and extend at least 1 m above the landing point, providing a secure handhold. We leave awkward or high access to a professional.
Repairing gutters without replacement
Replace failed fixings only after checking that the gutter and fascia can still support the channel. These steps can address local damage and help you judge whether the whole run needs replacing.
-
Replace Non-Threaded Gutter Spikes
Remove a loose, non-threaded spike and fit a new one through the existing gutter and fascia fixing points. Support the gutter as you work to prevent the channel twisting or straining a nearby joint. Once fitted, check that the new spike holds the gutter flush against the fascia. If the old hole no longer grips, do not rely on that loose fixing point for support.
-
Replace Damaged Gutter Hangers
Replace a bent or broken hanger rather than trying to straighten it under load. Choose a hanger suited to the gutter and position it in a slightly different part of the shingle or roofing material for a firmer fixing. As you secure it, keep the gutter aligned and check nearby supports for movement. The replacement should hold the channel without pulling the fascia or gutter joint out of line.
-
Replace Threaded Gutter Spikes
We remove a damaged threaded spike and fit a replacement measuring 7-8 inches long, with at least 2 inches of threading. If the new spike head passes through the gutter’s front hole, we drill a new hole 1⁄4 inch from the original. We push the spike through the gutter front by about 1⁄2 inch before fitting the ferrule. Then we tighten it until the gutter sits flush against the fascia, without forcing the channel out of shape.
- We reuse an undamaged threaded spike if it tightens securely and holds the gutter flush. If a loose spike hole needs more grip, we can fit a wooden shim about 2 inches long into the hole before refitting the spike carefully. We don’t use a shim to disguise rotten fascia, cracked guttering or several failed supports. Those faults affect the wider fixing surface, not just one spike.
- A local repair may suit a structurally sound gutter with secure fascia and only a few failed brackets or spikes. Replacement may be more suitable if the gutter repeatedly sags, has cracks, leaks at several joints or shows permanent distortion. Check the fascia before choosing: new screws cannot provide lasting support if the timber behind them is weak.
- After refitting, run water through the gutter and watch it flow towards the outlet. Check that it does not pool in the channel or leak at joints. If water backs up, clear debris and inspect the outlet and downpipe before assessing the repair. Keeping leaves and sludge out of the gutter also reduces strain on its supports and fixings.
- If several fixings have failed or the fascia is damaged, we can assess the support problem as part of our professional gutter repairs.
Diagnosing causes of sagging gutters
Gutters sag when their supports cannot hold the gutter and its contents, or when installation, blockages or damage disrupt drainage. Diagnose the cause before repairing so you address the strain, not just the visible dip.
- Start from the ground and inspect the full gutter run after rainfall. Note where the channel bows, pulls away from the fascia or holds water. A dip beneath a blocked outlet may have a different cause from a loose section farther along the run. Mark each problem area and compare its position with the joints, bends and downpipe.
- Look for debris that adds weight. Wet leaves, moss and sludge can strain gutter brackets, joints and fascia boards. A blocked outlet or downpipe can trap water and roof debris in the channel. Clear the gutter and check that water flows through the full drainage route, including the outlet and downpipe, before judging its alignment.
- Check bracket spacing and installation. Supports fitted too far apart may not hold a gutter filled with rainwater. A loose or misplaced bracket can also let water pool instead of flowing towards the outlet. Look for a section that sits lower than adjoining runs, and check whether fixings have pulled loose or the gutter lacks a consistent fall.
- Inspect the gutter material for age-related damage. UPVC can warp after years of sun exposure or standing water, changing the channel’s shape. Cast-iron gutters can corrode around joints and fixings, weakening support points. Plastic brackets may become brittle, while metal fixings can corrode or work loose. A permanently distorted or cracked section needs more than a bracket adjustment.
- Consider seasonal loading, too. Snow can add weight to supports, while standing water may freeze in cold conditions and put extra strain on stressed brackets. If the sag appeared after cold weather or heavy precipitation, check for trapped water and loose fixings. Do not assume weather was the only cause: blocked outlets and weak supports may contribute as well.
- Examine the fascia board where the brackets attach. Soft timber, flaking paint, dark staining and enlarged screw holes can indicate a failing fixing surface. If brackets keep loosening in the same area, weak fascia may be the underlying issue. Replacing the brackets without addressing damaged timber can leave the channel unsupported again.
- Compare the symptoms before choosing a repair. A single low point beside a blocked outlet suggests a drainage problem; repeated movement along a run points to support or installation issues. If several joints leak, cracks appear, or the channel remains misshapen after clearing debris, replacement may be more suitable than repeated local repairs.
Adding wood slivers and epoxy for support
A wood sliver dipped in epoxy can support a gutter spike. Use this method only for a local fixing problem, not to disguise a damaged gutter or weak fascia.
- Inspect the existing fixing before choosing this repair. Check whether the spike is loose in its hole and whether the gutter channel is intact. A wood sliver and epoxy may support a spike where its fixing point has loosened. They will not restore rotten fascia, a cracked gutter or a permanently warped section.
- Clear debris from the gutter around the fixing. Wet leaves and sludge add weight and can keep pulling on a loose spike after the repair. Check the outlet and downpipe too, so trapped water is not continuing to load the same section. Support the gutter and make sure the fixing is accessible before you work.
- Prepare a small wood sliver that fits beside the gutter spike. The repair guidance recommends a sliver about 2 inches long for filling a loose spike hole. Check that it sits alongside the spike without forcing the gutter channel out of position. Don’t use the wood to push a sagging run upwards or change its fall.
- Dip the sliver in epoxy, then place it beside the spike to provide extra support. Keep the epoxy and wood at the fixing point rather than spreading material across the gutter channel or joint. Follow the epoxy product’s instructions for application and setting. Do not load or adjust the fixing while the epoxy is setting.
- Once the epoxy has set as directed, inspect the fixing and gutter alignment. The spike should hold the gutter securely without pulling the channel away from the fascia. Run water through the repaired section and check that it drains towards the outlet without pooling or leaking. If the spike moves again, the fixing surface may need a more substantial repair.
- Assess the surrounding fascia before relying on this repair. Soft timber, dark staining or enlarged fixing holes can signal a wider support problem. Epoxy and a wood sliver will not strengthen weak timber. Repeated movement, several loose spikes or visible gutter damage are reasons to stop patching and address the underlying section.
- Keep the repair limited to a single loose fixing in otherwise sound guttering. If water has entered the property or related roof damage needs urgent attention, request emergency roof repair support. Addressing the source of water ingress helps protect the affected part of the property.
Archers Roofing Services Ltd: Pitched Roofing
Archers Roofing Services Ltd can help when a sagging gutter needs more than a small fixing repair. Our Guttering, Fascias & Soffits service addresses gutter runs and the boards that support them, tackling the underlying cause rather than just the visible dip. If roof water is contributing to the problem, our pitched and flat roofing services can address related roofing issues.
For homeowners and commercial property owners in Nottingham, Nottinghamshire, Leicestershire and Derbyshire, we can assess whether the gutter, fascia or nearby roof needs repair. A local repair may suit isolated damage; widespread gutter distortion or weakened fascia calls for a broader solution. We keep the work practical and tidy, with clear communication throughout.
Contact Archers Roofing Services Ltd or visit our site to discuss your guttering concerns: get in touch with our team.
Protect Your Property With a Clear Next Step
Knowing how to fix sagging gutters can help you make a more confident decision, but consider how the whole roof drains, too. If gutter trouble appears alongside water entering the property or damage near the roof edge, assess the wider area rather than treating each symptom separately. Pitched roofing, flat roofing and leadwork can all form part of the roof system that carries water towards the gutters.
Note where water spills or collects, and describe what you have seen when arranging an assessment. This gives the conversation a practical starting point and helps focus attention on the affected area. If you need help deciding what needs attention, Archers Roofing Services Ltd can discuss the roofing or guttering work involved.
Contact Archers Roofing Services Ltd to talk through your concerns and take the next step with confidence.
Frequently Asked Questions
How do you diagnose why a gutter is sagging?
To work out how to fix sagging gutters, first trace where the problem appears during or just after rainfall. Note whether water gathers at one low point, spills over the edge or escapes near a joint. Compare the affected area with nearby brackets and inspect the fascia for dark staining, soft timber or enlarged fixing holes. A sag that remains after clearing the channel may point to damaged supports, distorted guttering or a weak fixing surface.
How to reattach sagging gutters step by step
If you are learning how to fix sagging gutters, start by clearing the channel and confirming that the downpipe drains freely. Support the affected section, then remove loose or damaged fixings without twisting the gutter. Reposition or replace brackets so they grip solid material, keeping the channel aligned towards its outlet. Tighten each fixing until the gutter sits securely against the fascia without bowing. Finish by running water through the repaired section and checking for pooling, leaks or movement.
How far apart should gutter brackets be in the UK?
Set gutter support brackets no more than 1 metre apart, and place them within 150 millimetres of a join, bend or stopend. These limits help support the channel where joints and changes of direction can create vulnerable points. For example, if a bracket is missing beside a bend, add suitable support there rather than relying on widely spaced brackets along the straight run.
How do you set the correct gutter fall or slope?
Aim for a consistent fall towards the downpipe at a gradient of 1:350. Use a string line between the gutter’s high point and outlet to identify dips or uneven sections. Adjust the brackets gradually, then check that the channel doesn’t visibly bow or hold water. A controlled water test helps show whether water reaches the outlet and whether any joints leak after adjustment.
When should sagging gutters be repaired or replaced?
Repair the gutter when its channel is intact, the fascia is secure, and the problem is limited to a few failed supports or a blocked outlet. Replacement may be the better option if the gutter repeatedly sags, has cracks, leaks at several joints or remains permanently distorted. For example, tightening one loose bracket may fix a local fault, but it will not resolve widespread damage or weak fascia timber.